10 Easy ChatGPT Prompts to Kickstart Your Digital Product Business Today
10 Easy ChatGPT Prompts to Kickstart Your Digital Product Business Today Share the Knowledge This post may contain affiliate links, which means I may receive a commission if you purchase through my links, at no extra cost to you. Please read my disclosure policy for more information. In the fast-evolving digital landscape, creating and selling digital products has become one of the most lucrative and accessible ways to start an online business. With tools like ChatGPT, even beginners with little to no experience can generate digital products quickly. Whether you’re a creative mind, an entrepreneur, or someone looking for a side hustle, this article will provide 10 actionable ChatGPT prompts that will help you create and launch digital products today. 1. Create E-books and Guides: E-books are among the most popular digital products because they are easy to create and sell. Using ChatGPT, you can develop comprehensive guides on a wide range of topics. All you need is an idea, and ChatGPT can help you flesh out the content. ChatGPT Prompt Example: “Write a 10-chapter outline for an e-book on how to start a successful remote work career, covering topics like work-life balance, productivity, and finding remote jobs.” Once you have an outline, you can use ChatGPT to generate content for each chapter and edit it according to your voice and style. 2. Design Social Media Templates: Social media content is always in demand. From Instagram posts to Pinterest pins, business owners and influencers are constantly looking for attractive templates to enhance their brand. If you are good at design, ChatGPT can help you create catchy captions, hashtags, and content ideas. ChatGPT Prompt Example: “Generate 20 unique Instagram post caption ideas for a business selling eco-friendly home products.” Pair these captions with your designs, and you have a ready-to-sell social media template package! Pin the below image and save it to your Pinterest board. That way you’ll be able to come back to this article and read it again! 3. Develop Printable Planners: Printable planners are incredibly popular in the digital product space. These can range from daily planners to meal planners, workout logs, or financial budgeting sheets. Even if you’re not a design expert, you can use tools like Canva to create simple yet effective planners and ChatGPT to help develop the content. ChatGPT Prompt Example: “Create a 30-day meal plan for a family of four, including breakfast, lunch, and dinner options with balanced nutrition.” You can turn this meal plan into a printable PDF that customers can use to organize their daily meals. 4. Craft Digital Courses: Online education is booming, and creating digital courses has become a powerful way to monetize knowledge. You can use ChatGPT to brainstorm course ideas, create lesson plans, and even develop the written content for course materials. ChatGPT Prompt Example: “Create a lesson plan for a beginner’s course on personal finance, covering budgeting, saving, and investing basics.” Once you have the framework, you can record videos, create worksheets, or design infographics to complement your course materials. 5. Create Personalized Journals: Journaling has become a popular habit for many people looking to enhance their mental health, productivity, or creativity. Personalized journals are a great digital product to sell, especially when paired with prompts or daily exercises. ChatGPT Prompt Example: “Generate 30 journaling prompts for self-reflection, focusing on personal growth, gratitude, and mindfulness.” With ChatGPT, you can easily create hundreds of journaling prompts and format them into an attractive, downloadable journal. 6. Generate Stock Photography and Captions: If you’re a photographer or someone interested in building a stock photo collection, combining visuals with creative text can set your products apart. Stock photos paired with descriptions, captions, and tags can be a valuable product for content creators. ChatGPT Prompt Example: “Generate descriptive captions for a series of minimalist workspace photos for use on websites and blogs.” Add a keyword-rich description and sell your photos along with pre-made captions to help businesses save time on their content creation. 7. Create Digital Art Prints: Digital art is one of the most profitable digital products because it requires minimal overhead and can be sold multiple times. You can create art prints for home decor, inspirational quotes, or custom illustrations and sell them on platforms like Etsy. ChatGPT Prompt Example: “Create 10 motivational quotes for wall art prints that would appeal to a modern home decor audience.” Once you have your quotes, pair them with designs and sell them as downloadable prints or posters. 8. Develop DIY Project Guides: For the crafty and creative, DIY (Do It Yourself) guides are another excellent option for a digital product. From home improvement to crafts and hobbies, people love to learn new skills through easy-to-follow guides. ChatGPT Prompt Example: “Outline a 7-step DIY guide for building a wooden bookshelf using basic tools, including materials needed and instructions for each step.” You can turn this outline into a detailed PDF guide or an instructional video course, and sell it as a downloadable product. 9. Design Digital Stickers and Icons: Digital stickers and icons are widely used in personal planners, social media, and even business presentations. If you’re into illustration or graphic design, you can create sticker packs or icon sets for platforms like Etsy or Creative Market. ChatGPT Prompt Example: “Generate ideas for a set of 25 digital stickers focusing on a ‘self-care’ theme, including quotes, symbols, and illustrations.” Turn these ideas into designs, and you’ve got yourself a ready-to-sell digital sticker pack! 10. Create Video Scripts and Storyboards: If you enjoy creating video content but don’t want to be in front of the camera, writing video scripts and storyboards can be an ideal digital product. Many YouTubers, social media influencers, and marketers need help with scriptwriting for educational or promotional videos. ChatGPT Prompt Example: “Write a 2-minute video script for a YouTube video explaining how to start a bullet journaling habit.” You can package your scripts and storyboards for sale, or offer them as a service to video creators. Conclusion
Master the Art of Creating Viral Pinterest Pins Quickly
Master the Art of Creating Viral Pinterest Pins Quickly Share the Knowledge This post may contain affiliate links, which means I may receive a commission if you purchase through my links, at no extra cost to you. Please read my disclosure policy for more information. Pinterest is a visual discovery engine that’s perfect for driving traffic to your blog, online store, or portfolio. But with over 400 million active users, it can be challenging to stand out. The secret to success on Pinterest? Creating viral pins that capture attention, encourage clicks, and get shared across the platform. This article will guide you through the process of creating viral pins quickly, without sacrificing quality. Pin the below image and save it to your Pinterest board. That way you’ll be able to come back to this article and read it again! Understanding the Anatomy of a Viral Pin Before diving into the creation process, it’s essential to understand what makes a pin go viral. Viral pins share several characteristics: Eye-Catching Visuals: A viral pin stands out in the feed. This means using high-quality images, bold text overlays, and appealing colors. Clear and Compelling Messaging: The text on your pin should be easy to read and deliver a clear message. It should convey value and entice users to click through. Relevance and Timing: Viral pins often tap into current trends or seasonal interests. They are relevant to what users are searching for at the moment. Effective Use of Keywords: Like other search engines, Pinterest relies heavily on keywords. Viral pins often rank high in searches because they use relevant keywords in the pin description, title, and even the image file name. Optimized for Pinterest’s Preferred Dimensions: Pinterest favors vertical pins with an aspect ratio of 2:3 (e.g., 1000 x 1500 pixels). These take up more space on the screen and are more likely to catch a user’s eye. Step 1: Brainstorming Ideas for Viral Pins To create viral pins quickly, you need to start with a solid idea. Here’s how to brainstorm effectively: Research Trends: Use Pinterest’s Trends tool to see what topics are currently popular. Look for seasonal trends, upcoming holidays, and recurring events. You can also check out what’s trending in your niche. Analyze Competitors: Look at what your competitors are pinning. Which of their pins are getting the most engagement? Analyze their successful pins and think about how you can create something similar but with your unique twist. Use Popular Content as Inspiration: Check your blog’s analytics to see which posts are getting the most traffic. These are likely to perform well on Pinterest too. If you have a top-performing blog post, consider creating multiple pins for it. Think About Your Audience’s Pain Points: What problems are your audience facing? What questions are they asking? Pins that address a common pain point or offer a solution tend to get shared more often. Step 2: Designing Your Pin Once you have an idea, it’s time to bring it to life. Here’s how to design a pin that has the potential to go viral: Use High-Quality Images: Pinterest is a visual platform, so the quality of your images is crucial. Use high-resolution photos that are bright, clear, and relevant to your content. Choose the Right Colors: Color plays a significant role in catching the user’s eye. Use bright, contrasting colors to make your pin stand out. However, make sure the colors align with your brand. Add Text Overlays: Text overlays are essential for communicating the main idea of your pin. Use bold, easy-to-read fonts. The text should be large enough to read on mobile devices, as most Pinterest users are on mobile. Create Multiple Versions: Don’t just create one pin for each piece of content. Create multiple versions with different designs, colors, and text overlays. This increases your chances of one of them going viral. Incorporate Your Branding: Add your logo or website URL to your pin. This not only helps with brand recognition but also prevents others from stealing your content. Step 3: Writing a Compelling Pin Description A great pin design needs to be paired with an equally compelling description. Here’s how to write a description that can help your pin go viral: Use Keywords Strategically: Include relevant keywords in your pin description. These should be words or phrases that users are likely to search for when looking for content like yours. Include keywords naturally within the first few sentences. Provide Value: Your description should communicate the value of your content. Why should users click through to your website? What will they learn or gain? Be clear about the benefits. Include a Call to Action: Encourage users to take the next step, whether it’s clicking through to your blog, saving the pin for later, or visiting your online store. Keep It Natural: While keywords are important, avoid keyword stuffing. Your description should be easy to read and flow naturally. Use Hashtags Wisely: Pinterest allows you to use hashtags in your pin descriptions. Use a mix of broad and niche hashtags to increase the visibility of your pin. Step 4: Optimizing Your Pin for Pinterest Search To increase the chances of your pin going viral, it needs to be discoverable. Here’s how to optimize your pin for Pinterest search: Optimize the Pin Title: Just like your description, the pin title should include relevant keywords. Make sure the title is clear, compelling, and includes your main keyword. Use Alt Text Wisely: When uploading your pin, you’ll have the option to add alt text. This text should describe the image and include relevant keywords. It helps Pinterest understand what your pin is about. Name Your Image File Properly: Before uploading your image, rename the file to include your main keyword. Instead of “IMG1234.jpg,” use a descriptive file name like “how-to-create-viral-pins.jpg.” Create Rich Pins: Rich Pins provide more context by pulling additional information directly from your website. There are different types of Rich Pins, including article, product, and recipe pins. Setting up
How to start a profitable blog in 2024

How to Start a Profitable Blog in 2024: A Comprehensive Guide Share the Knowledge This post may contain affiliate links, which means I may receive a commission if you purchase through my links, at no extra cost to you. Please read my disclosure policy for more information. In today’s digital age, starting a blog is more than just a hobby; it can be a lucrative business venture. With the right strategy, you can turn your passion into a profitable blog. This guide will walk you through the essential steps to start and monetize a blog in 2024. 1. Identify Your Niche The first step to starting a profitable blog is to choose a niche that you are passionate about and has a viable audience. A niche helps you focus your content and attract a dedicated readership. Consider the following when selecting your niche: Interest and Passion: Choose a topic you are genuinely interested in. Blogging requires consistency, and passion will keep you motivated. Market Demand: Research your niche to ensure there is a substantial audience. Use tools like Google Trends, Ahrefs, and SEMrush to analyze search volume and competition. Monetization Potential: Ensure your niche has monetization opportunities. Look for niches with high affiliate marketing potential, sponsored content, and product opportunities. 2. Create a Unique Brand Branding is crucial for standing out in the crowded blogosphere. A strong brand includes a memorable name, a compelling logo, and a consistent visual style. Here’s how to create your blog’s brand: Blog Name: Choose a name that reflects your niche and is easy to remember. Check domain availability using services like Namecheap or GoDaddy. Logo Design: Use tools like Canva or hire a graphic designer to create a professional logo. Brand Colors and Fonts: Select a color palette and fonts that represent your blog’s personality. Use them consistently across your blog and social media. 3. Set Up Your Blog Setting up your blog involves choosing a blogging platform, hosting service, and designing your site. Follow these steps to get started: Choose a Blogging Platform: WordPress.org is the most popular choice due to its flexibility and customization options. Select a Hosting Provider: Reliable hosting is essential for performance and security. Consider providers like SiteGround Install WordPress: Most hosting services offer one-click WordPress installation. Select a Theme: Choose a WordPress theme that is responsive and visually appealing. Themes like Astra, OceanWP, and GeneratePress are excellent choices. Customize Your Blog: Personalize your blog with a custom header, logo, and colors. Ensure your blog is user-friendly and mobile-optimized. 4. Create High-Quality Content Content is the backbone of your blog. High-quality, engaging content will attract readers and keep them coming back. Follow these tips for content creation: Content Strategy: Develop a content calendar to plan your posts in advance. Include a mix of evergreen content, current trends, and seasonal topics. SEO Optimization: Optimize your posts for search engines by using keywords, meta descriptions, and alt text for images. Use tools like Yoast SEO or Rank Math for assistance. Engaging Writing: Write in a conversational tone, use subheadings, bullet points, and images to break up text and make it more readable. Regular Posting: Consistency is key. Aim to publish at least one new post per week to keep your audience engaged. 5. Promote Your Blog Promotion is critical to growing your blog’s audience. Utilize various channels to drive traffic to your site: Social Media: Share your posts on platforms like Facebook, Twitter, Instagram, and Pinterest. Tailor your content to each platform’s audience. Email Marketing: Build an email list from day one. Offer a freebie (e.g., an ebook or checklist) in exchange for email subscriptions. Use email marketing services like Mailchimp or ConvertKit to manage your list. Guest Blogging: Write guest posts for popular blogs in your niche. Include links back to your blog to drive traffic and improve SEO. Collaborations: Partner with other bloggers, influencers, or brands for mutual promotion. 6. Monetize Your Blog Once you have a steady stream of traffic, it’s time to monetize your blog. Here are several ways to make money from your blog: Affiliate Marketing: Promote products or services and earn a commission for every sale made through your affiliate links. Join affiliate programs like Amazon Associates, ShareASale, or CJ Affiliate. Ad Networks: Display ads on your blog through networks like Google AdSense or Mediavine. You earn money based on ad impressions and clicks. Sponsored Posts: Partner with brands to create sponsored content. Ensure the products you promote align with your niche and audience. Digital Products: Create and sell digital products like ebooks, online courses, or printables. Platforms like Teachable and Gumroad can help you manage sales. Membership Sites: Offer exclusive content or services to subscribers for a monthly fee. Use plugins like MemberPress or Patreon for subscription management. Pin the below image and save it to your Pinterest board. That way you’ll be able to come back to this article and read it again! 7. Analyze and Optimize Regularly analyze your blog’s performance to identify what’s working and what needs improvement. Use these tools for analysis: Google Analytics: Track your blog’s traffic, user behavior, and conversion rates. Use this data to refine your content and marketing strategies. Google Search Console: Monitor your site’s search performance, identify indexing issues, and optimize your SEO strategy. A/B Testing: Experiment with different headlines, images, and calls to action to see what resonates best with your audience. 8. Stay Updated The blogging landscape is constantly evolving. Stay updated with the latest trends and strategies to keep your blog competitive: Follow Industry Blogs: Read blogs like ProBlogger, Neil Patel, and Moz for the latest blogging and SEO tips. Join Blogging Communities: Participate in forums and groups on platforms like Facebook, Reddit, or Slack to connect with other bloggers and share insights. Continuing Education: Invest in courses or attend webinars and conferences to improve your blogging skills. Conclusion Starting a profitable blog in 2024 requires careful planning, consistent effort, and strategic promotion. By following these steps, you can build a successful
10 Best Selling Digital Products: Sell like crazy!
10 Best selling digital products: Sell like crazy! Share the Knowledge This post may contain affiliate links, which means I may receive a commission if you purchase through my links, at no extra cost to you. Please read my disclosure policy for more information. In the digital age, creating and selling digital products has become a lucrative way to generate income. Whether you’re an entrepreneur, creative professional, or just someone with a passion to share, digital products offer scalability, low overhead costs, and a global audience. As we move further into 2024, certain digital products are trending to sell exceptionally well. This article explores ten digital products that can help you tap into profitable markets and turn your ideas into revenue. 1. Online Courses Overview: Online courses remain one of the most popular and profitable digital products. They allow you to leverage your expertise in a specific field and teach others through structured content. Why They Sell: People are always looking to improve their skills and knowledge. Courses can be on anything from coding and digital marketing to cooking and personal development. Platforms like Udemy, Teachable, and Thinkific make it easy to create and market your courses. Tips for Success: Identify a niche with high demand. Use engaging content formats (videos, quizzes, assignments). Provide actionable takeaways and real-world applications. 2. E-books Overview: E-books are digital versions of books that can be read on various devices. They are easy to produce and distribute and can cover a wide range of topics. Why They Sell: E-books are accessible and convenient. They can be a great way to share knowledge, stories, or insights. With self-publishing platforms like Amazon Kindle Direct Publishing and Apple Books, authors can reach a global audience. Tips for Success: Choose a topic that addresses a specific problem or interest. Design a professional-looking cover and layout. Promote your e-book through social media and email marketing. 3. Printables Overview: Printables are digital files that users can download and print at home. They include planners, checklists, art prints, and more. Why They Sell: Printables are popular due to their convenience and customization options. People love having tools that help them stay organized or add a personal touch to their space. Platforms like Etsy and Gumroad are ideal for selling printables. Tips for Success: Create high-quality, visually appealing designs. Offer a variety of templates to cater to different needs. Utilize keywords and tags effectively for searchability. Pin the below image and save it to your Pinterest board. That way you’ll be able to come back to this article and read it again! 4. Stock Photos and Graphics Overview: If you’re a photographer or graphic designer, selling stock photos and graphics can be a lucrative digital product. These can include high-resolution images, illustrations, icons, and vectors. Why They Sell: Content creators, marketers, and businesses constantly need high-quality visuals for their projects. Websites like Shutterstock, Adobe Stock, and Creative Market are great platforms to sell your creations. Tips for Success: Focus on niche subjects or unique perspectives. Ensure your images are high-quality and professionally edited. Offer various licenses to cater to different uses. 5. Website and Blog Templates Overview: Templates for websites and blogs are in high demand as businesses and individuals seek to establish their online presence with ease. Why They Sell: Many people want a professional-looking site but lack the skills to design one from scratch. Templates offer a cost-effective and time-saving solution. Platforms like ThemeForest and TemplateMonster can help you reach your target audience. Tips for Success: Create responsive and customizable templates. Provide detailed documentation and support. Keep up with current design trends and best practices. 6. Music and Audio Files Overview: Music tracks, sound effects, and audio loops are essential for content creators, video producers, and game developers. Why They Sell: High-quality audio assets enhance the production value of various media projects. You can sell your music or sound effects on platforms like AudioJungle and Pond5. Tips for Success: Ensure high audio quality and clear licensing terms. Offer a diverse range of genres and styles. Consider bundling audio files for added value. 7. Software and Apps Overview: Developing software or mobile apps can be highly profitable if you identify a need or create something that enhances productivity or entertainment. Why They Sell: With the increasing reliance on technology, users are constantly looking for tools that simplify tasks or provide new functionalities. Platforms like the Apple App Store and Google Play Store can help you reach potential customers. Tips for Success: Conduct market research to identify gaps or opportunities. Focus on user experience and functionality. Regularly update and support your product. 8. Digital Art and Design Assets Overview: Digital art, including illustrations, patterns, and design assets, can be sold as downloadable files for use in various creative projects. Why They Sell: Artists and designers need unique assets to enhance their work. By providing high-quality and versatile assets, you can attract a broad audience. Platforms like Creative Market and Envato Elements are popular for selling these products. Tips for Success: Create unique and high-resolution designs. Provide multiple formats and variations. Showcase your work in a well-organized portfolio. 9. Online Memberships Overview: Membership sites offer exclusive content or services to subscribers for a recurring fee. This can include access to premium articles, videos, forums, or special tools. Why They Sell: Memberships provide ongoing value and create a stable income stream. Subscribers are willing to pay for access to valuable or exclusive content. Platforms like Patreon and MemberPress can help you manage memberships. Tips for Success: Offer high-quality, regularly updated content. Build a community around your membership. Provide incentives for ongoing subscriptions, such as discounts or early access. 10. Digital Marketing Templates Overview: Templates for marketing materials, including social media graphics, email newsletters, and advertising banners, are highly sought after. Why They Sell: Businesses and marketers need effective tools to create eye-catching marketing materials quickly. By offering customizable and professional templates, you can meet this demand. Platforms like Canva and Creative Market are
How to Use Canva to Create Stunning Social Media Graphics
How to Use Canva to Create Stunning Social Media Graphics Share the Knowledge Creating stunning social media graphics can significantly enhance your online presence. Canva is an excellent tool for designing high-quality graphics, even if you have no prior design experience. Here’s how to use Canva to create beautiful social media graphics that capture your audience’s attention. 1. Sign Up and Get StartedGetting started with Canva is easy. Here’s what you need to do: Sign Up: Visit Canva’s website and sign up for a free account. You can upgrade to Canva Pro for additional features. Choose a Template: Canva offers a wide range of templates for different social media platforms, including Instagram, Facebook, Twitter, and Pinterest. Select a template that suits your needs. 2. Customize Your TemplateCanva’s drag-and-drop interface makes customization simple. Here’s how to customize your template: Change the Text: Click on the text boxes to edit the text. Use fonts that align with your brand’s style. Add Images: Upload your images or choose from Canva’s extensive library of free and premium stock photos. Adjust Colors: Use your brand’s color palette to ensure consistency. You can change the colors of text, backgrounds, and other elements. 3. Use Design ElementsCanva offers various design elements to enhance your graphics. Here’s how to use them: Shapes and Icons: Add shapes, icons, and illustrations to your design. These elements can help highlight important information.Frames and Grids: Use frames and grids to organize your images and create a clean layout.Backgrounds: Experiment with different background options, including solid colors, gradients, and patterns. 4. Save and Download Your DesignOnce you’re happy with your design, it’s time to save and download it. Here’s how: Save Your Design: Click the ‘Save’ button to ensure you don’t lose your work.Download Options: Canva allows you to download your design in various formats, including PNG, JPG, and PDF. Choose the format that best suits your needs. Pin the below image and save it to your Pinterest board. That way you’ll be able to come back to this article and read it again! 5. Share Your GraphicsSharing your graphics on social media is the final step. Here’s how to do it effectively: Optimize for Each Platform: Ensure your graphics are optimized for the specific social media platform you’re posting on. Different platforms have different size requirements.Use Scheduling Tools: Use scheduling tools like Hootsuite or Buffer to plan and schedule your posts in advance.Engage with Your Audience: Encourage your audience to engage with your posts by asking questions and prompting discussions. ConclusionCanva is a powerful tool for creating stunning social media graphics. By following these steps, you can design high-quality visuals that capture your audience’s attention and enhance your online presence. For more tips on improving your social media strategy, check out our article on Top 10 Tips for Effective Social Media Marketing. Share the Knowledge Edit Template
10 Best Practices for Creating Engaging Social Media Posts
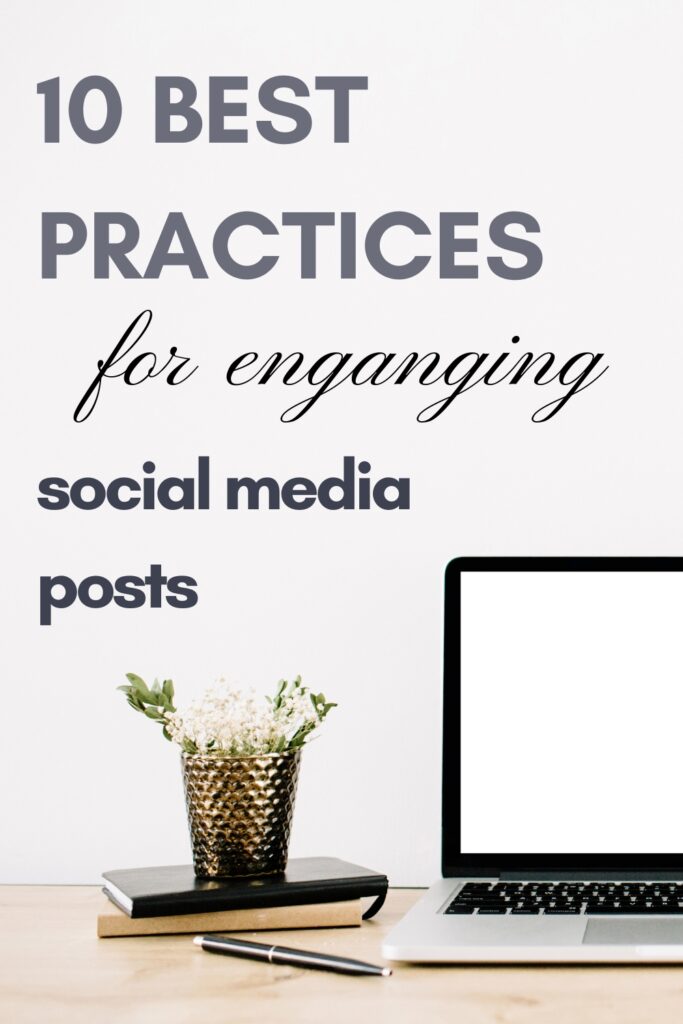
10 Best Practices for Creating Engaging Social Media Posts Share the Knowledge Pin the below image and save it to your Pinterest board. That way you’ll be able to come back to this article and read it again! Creating engaging social media posts is crucial for capturing your audience’s attention and driving interaction. Here are 10 best practices to help you craft compelling content that stands out. Best Practices for Social Media Posts Use High-Quality Visuals: Eye-catching images and videos attract more engagement. Write Engaging Captions: Craft captions that encourage interaction. Incorporate Hashtags: Use relevant hashtags to increase your reach. Post Consistently: Maintain a regular posting schedule to keep your audience engaged. Utilize Stories and Reels: Leverage platform-specific features like Instagram Stories and Reels. Engage with Your Audience: Respond to comments and messages promptly. Analyze Performance: Use analytics to understand what works best. Collaborate with Influencers: Partnering with influencers can boost your visibility. Share User-Generated Content: Encourage your followers to share their own content. Use Call-to-Actions: Direct your audience to take specific actions. Pro Tip: Utilizing pre-designed templates like this one here can save you time and maintain consistency. For more design tips, see our post on Top Design Trends for Social Media in 2024. Enhancing your social media posts is just one aspect of a robust marketing strategy. To explore more ways to stay organized and efficient, check out our guide on The Ultimate Guide to Planning Your Content Calendar. Conclusion By implementing these best practices, you can create social media content that not only captures attention but also fosters engagement and growth. Remember, consistency and quality are key. Start applying these tips today and watch your social media presence flourish. Share the Knowledge Edit Template
The Ultimate Guide to Planning Your Content Calendar

The Ultimate Guide to Planning Your Content Calendar Share the Knowledge Pin the below image and save it to your Pinterest board. That way you’ll be able to come back to this article and read it again! In the fast-paced world of digital marketing, staying organized and ahead of schedule is crucial for maintaining a consistent and effective online presence. One of the most powerful tools for achieving this is a content calendar. Whether you’re a seasoned marketer or just starting out, this guide will walk you through the essential steps to creating a content calendar that will keep your business organized and on track. What is a Content Calendar? A content calendar is a strategic tool that outlines your content creation and publication schedule. It helps you plan, organize, and manage your content across various platforms, ensuring that you consistently deliver valuable content to your audience. Why You Need a Content Calendar Consistency: Regular posting keeps your audience engaged and improves your online presence. Organization: A content calendar helps you keep track of deadlines, ideas, and content across multiple platforms. Efficiency: By planning ahead, you can allocate your resources effectively and avoid last-minute scrambles. Strategic Planning: It allows you to align your content with business goals, marketing campaigns, and seasonal trends. Steps to Creating an Effective Content Calendar Define Your Goals: Determine what you want to achieve with your content. Are you looking to increase brand awareness, drive traffic, generate leads, or boost sales? Your goals will guide your content strategy. Identify Your Audience: Understand who your audience is and what content they find valuable. Create buyer personas to guide your content creation process. Choose Your Platforms: Decide which platforms you will use to distribute your content. This could include your blog, social media channels, email newsletters, and more. Plan Your Content Types: Diversify your content to keep your audience engaged. This could include blog posts, social media updates, videos, infographics, and more. Create a Content Outline: Develop a high-level outline of your content topics and themes. This will help you maintain a consistent message and avoid content gaps. Set a Posting Schedule: Determine how often you will post content on each platform. Consistency is key, so choose a schedule that you can realistically maintain. Use a Content Calendar Tool: There are various tools available to help you create and manage your content calendar. Tools like Trello, Asana, and Google Sheets are popular choices. For a more streamlined process, consider using our digital planners, which are designed to help you stay organized and on track. Planning your content calendar is just one part of a successful content strategy. To dive deeper into creating engaging content, check out our post on 10 Best Practices for Creating Engaging Social Media Posts. This articles provides additional insights and practical advice to help you enhance your content strategy and grow your online presence. Conclusion Creating an effective content calendar is essential for maintaining a consistent and organized approach to your content marketing efforts. By defining your goals, understanding your audience, and using the right tools, you can streamline your content creation process and achieve your business objectives. Start planning your content calendar today and see the difference it can make for your brand. Share the Knowledge